Posting a Great Dane’s Ears After Cropping
If you've just brought home a Great Dane puppy with newly cropped ears, or you're considering the procedure, you're likely bracing for the next big step: ear posting. It can feel like an intimidating, never-ending commitment, a delicate balance of precision and patience that often leaves new owners feeling overwhelmed and a little bit frustrated. Many of us have been there, staring at those little ears wondering if we're doing it right! This guide is here to walk you through every single detail of posting your Great Dane's ears, from understanding the healing process to mastering the technique and troubleshooting common issues, ensuring you feel confident and supported throughout this critical period.
The Journey of Cropped Ears: From Surgery to Standing Proud
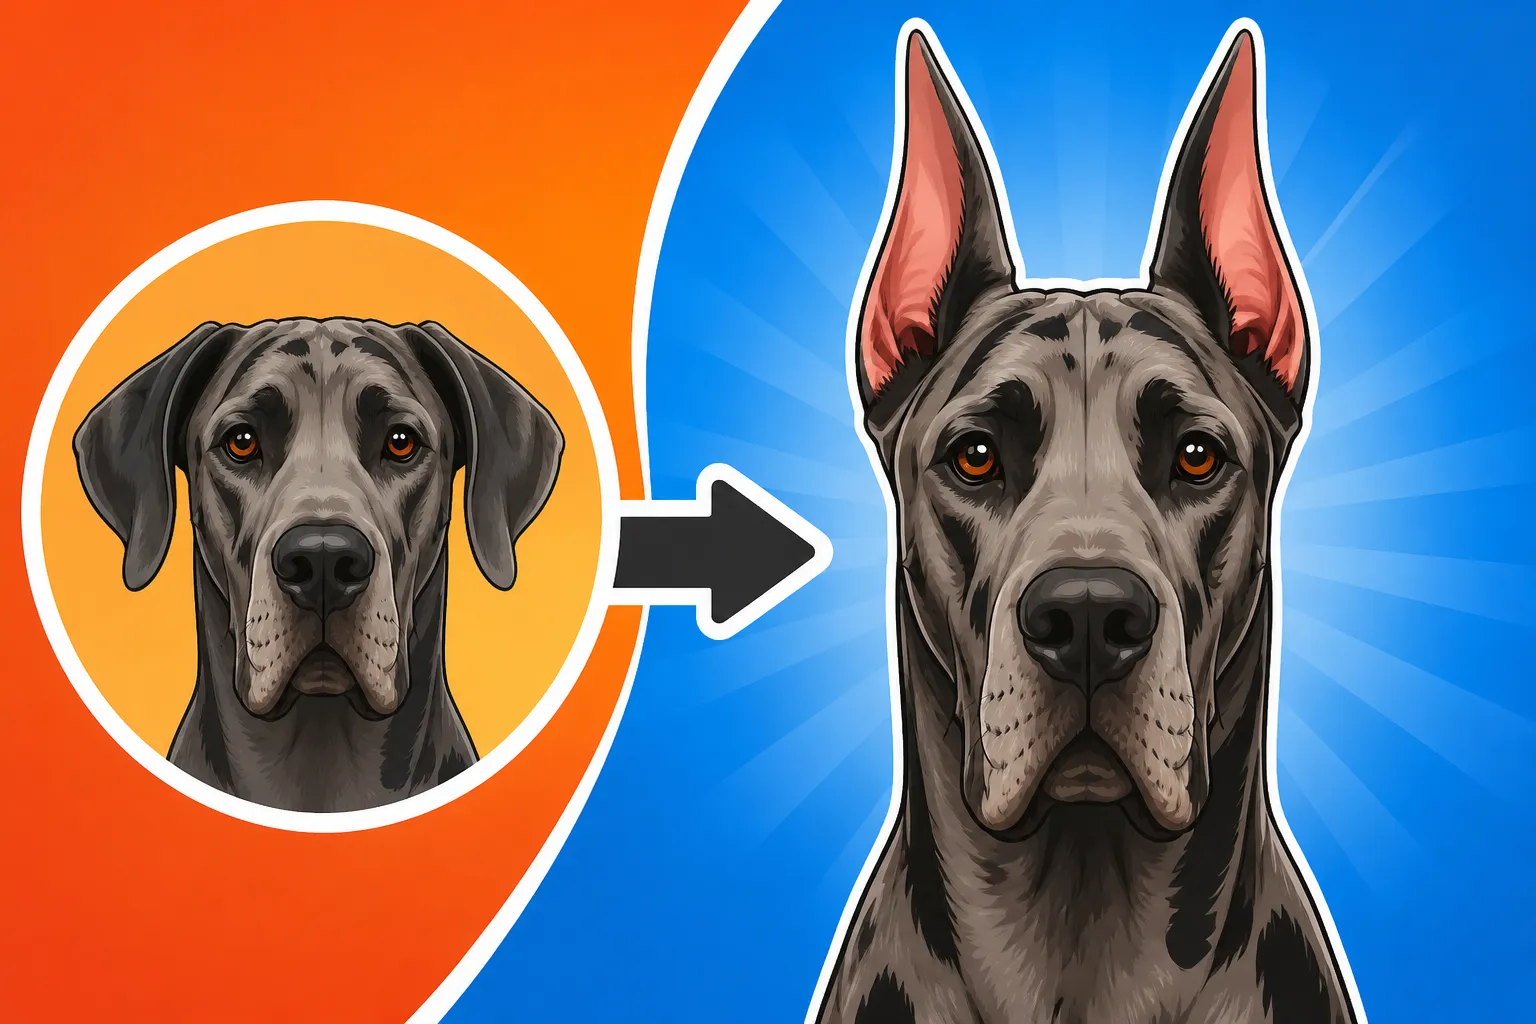
Before we dive into the nitty-gritty of posting, it's helpful to understand the overall process and why posting is such a vital component. Ear cropping, while a deeply personal and often debated decision, is a surgical procedure usually performed on Great Dane puppies between 7 and 12 weeks of age. The goal is to give the ears a specific shape that, when fully developed and trained, will stand erect.
The "training" part is where posting comes in. A Great Dane's ears, naturally, are pendulous. The surgery changes the shape, but it doesn't automatically make them stand up. That's where you, the dedicated owner, become the "trainer." Think of it like a human getting braces – the initial procedure sets the stage, but consistent application of pressure and support over time is what reshapes and solidifies the desired outcome. Without diligent and correct posting, those beautifully cropped ears simply won't stand, no matter how skilled the initial surgery.
Why Posting is Absolutely Essential for Great Dane Ears
The Great Dane breed standard, particularly in North America, often describes a tall, erect ear set, which is typically achieved through cropping. After the initial surgery, the ear cartilage is soft and malleable, much like a young tree sapling. If you want that sapling to grow straight and tall, you often need to stake it and guide its growth. That's precisely what ear posting does for your Great Dane's ears.
The posts provide internal support, holding the ear in the desired upright position. The tape then secures the ear to this post, creating gentle, consistent pressure that encourages the cartilage to stiffen and develop into that iconic erect shape. It's a process that capitalizes on the puppy's rapid growth and malleable tissues. If you skip posting or do it inconsistently, the cartilage will heal in a floppy position, and once that happens, it's virtually impossible to correct without further, often more invasive, intervention. Ear Cropping Costs on a Great Dane can be significant, and you want to ensure that investment isn't wasted by neglecting the crucial posting phase.
What to Expect Immediately After Surgery
Your Great Dane puppy will come home from surgery with their newly shaped ears likely bandaged or stitched. This initial phase is all about healing. Your vet will give you specific instructions on how to care for the surgical sites, which will include keeping them clean and dry, administering any prescribed pain medication or antibiotics, and potentially having your puppy wear an Elizabethan collar (the "cone of shame") to prevent them from scratching or damaging the stitches.
It's critical not to rush into posting during this initial healing period. The incisions need to close completely, and any swelling or tenderness must subside. Attempting to post too early can cause pain, introduce infection, and ultimately compromise the success of the entire process. Always follow your veterinarian's guidance on when it's safe to begin posting. Typically, this is around 7 to 14 days post-surgery, once the stitches are removed and the ear edges are completely healed and dry.
Preparing for the Posting Marathon: Supplies and First Steps
Ear posting truly is a marathon, not a sprint. It can last for weeks, sometimes months, depending on your puppy's individual ears and how quickly their cartilage hardens. Being prepared with the right supplies and knowing the initial steps will make the process much smoother for both you and your Great Dane.
Essential Supplies You'll Need
Gathering all your materials before you start is a game-changer. There's nothing worse than being mid-post with a wiggly puppy and realizing you're missing something vital! Here's a list of what you'll typically need:
- Posts: The core of your posting system. Backer rod (a foam insulation material from hardware stores), tampons, or even specifically designed ear posting kits work well. Backer rod is often preferred for its flexibility and ability to be cut to size.
- Adhesive Tape: Medical-grade porous tape is key. Zonas porous tape (often used by athletic trainers) in 1-inch and 2-inch widths is a popular choice because it breathes, reducing skin irritation. Avoid non-porous tapes like electrical tape, which can trap moisture.
- Skin Adhesive (Optional but Recommended): Products like Torbot Skin Bond or Skin-Bond W are invaluable. They create a strong, durable adhesion between the ear leather and the post, helping the post stay put without needing excessively tight taping on the delicate skin.
- Pre-Wrap (Optional): Some people like to use a thin layer of self-adhesive pre-wrap bandage on the posts before taping to add a little cushioning.
- Antiseptic Wipes/Rubbing Alcohol: For cleaning the ears thoroughly before each posting.
- Cotton Balls or Pads: For applying cleaners and drying the ears.
- Blunt-Nosed Scissors: Absolutely crucial for safely cutting tape and posts, especially when removing old posts, to avoid nicking your puppy's ear.
- Powder (Optional): Gold Bond powder or a similar non-medicated drying powder can be applied to the ear to absorb moisture and prevent skin irritation.
- High-Value Treats: Your puppy is going to need a lot of positive reinforcement! You'll find most of these supplies readily available online, places like Chewy are a good go-to for all your Great Dane's needs, from bulk tape to gentle puppy treats. Remember, a well-stocked supply drawer saves a lot of last-minute stress!
The Initial Clean-Up and Inspection
Before you even think about putting a post in, the ears need to be meticulously clean and completely dry. This is paramount to preventing skin irritation and infection.
First, gently remove any old posts and tape. Take your time, being careful not to pull on the delicate ear leather. Use a tape remover solution or mineral oil if the adhesive is particularly stubborn. Once the old materials are off, thoroughly clean the entire ear, both inside and out, with an antiseptic wipe or rubbing alcohol on a cotton ball. Pay close attention to any folds or crevices where dirt or moisture might hide. You're looking for clean, pink skin without any redness, swelling, or odor. A healthy ear smells clean. If you notice any redness, oozing, or a foul smell, it's time to pause and call your vet. Whether a Great Dane's Ears Trap Infection is a real concern, and early intervention is key.
After cleaning, ensure the ears are bone dry. You can gently pat them with a clean towel or allow them to air dry for a few minutes. Moisture is the enemy of successful posting, as it can lead to skin breakdown and infection. This pre-posting prep is non-negotiable every single time you change the posts.
The Art of Ear Posting: A Step-by-Step Method
Now for the main event! While there are various posting methods, the "backer rod and tape" method is widely popular and effective. This detailed breakdown will guide you through it.
Step 1: Preparing Your Posts
If using backer rod, cut two pieces that are slightly shorter than the length of your Great Dane's ear from base to tip. You want the post to provide internal support without poking out past the ear tip. For a young puppy, a 3/8-inch or 1/2-inch diameter backer rod often works well. You can then wrap these backer rod pieces with a layer of 1-inch tape, sticky side out initially, and then sticky side in, to create a slightly firmer, more sanitary post. Alternatively, some people use a thin layer of pre-wrap for cushioning before the final tape layer.
If you're using tampons, choose an appropriate size for your puppy's ears and follow a similar wrapping method to create a sturdy post. The key is to create a firm yet comfortable core that will hold the ear upright.
Step 2: Applying Skin Adhesive and Inserting the Post
This is where things get a little sticky, literally! Apply a thin, even layer of skin adhesive (like Torbot Skin Bond) to the bottom third of the backer rod post and directly onto the clean, dry inner surface of your puppy's ear, focusing on the cartilage area rather than the delicate edges. Allow the adhesive to become tacky for about 30-60 seconds, as per product instructions.
Now, gently insert the prepared post into your Great Dane's ear canal, pushing it down until it sits snugly at the base of the ear. Make sure the ear is pulled up and stretched slightly taut around the post. You want the post to sit deep enough to provide support from the base, but never force it or jam it in. It should be comfortable, not painful. Your puppy might shake their head a bit, which is normal as they adjust.
Step 3: Taping the Ear to the Post
Once the post is in place, you'll begin taping. Start at the base of the ear, just above where the post sits. Using 1-inch porous tape, wrap around the base of the ear and the post once or twice, securing the post firmly in place. Ensure you're not wrapping too tightly; you should be able to slide a fingernail under the tape without much resistance.
Work your way up the ear, wrapping the tape in a spiral pattern, slightly overlapping each layer. As you wrap, gently pull the ear leather up and around the post to keep it smooth and free of wrinkles. This helps the cartilage conform to the post's shape. Stop wrapping just below the very tip of the ear, leaving the tip exposed for air circulation and to monitor blood flow. A properly taped ear should look smooth and stand straight up, without any creases or folds. Remember those high-value treats! Keep a stash of high-value treats handy – maybe some of those fresh, tasty options from Ollie – to reward your Great Dane puppy for their patience during the posting process.
Step 4: Creating a Bridge (Optional but Recommended)
For extra stability, especially if you're posting both ears, you can create a "bridge" between the two ears. Once both ears are individually posted, take a strip of tape (often 2-inch tape is used here) and create a loose bridge across the top of the puppy's head, connecting the two posts. This prevents the ears from splaying out and helps them stand parallel.
The bridge should be just tight enough to hold the ears in alignment, but not so tight that it pulls them inward or restricts head movement. You want a slight slack to allow for natural movement. Avoid taping over the top of the skull tightly; the bridge should sit comfortably around the head, just behind the forehead.
Step 5: Final Check and Observation
After posting, always do a thorough check. Gently feel the ear. Is it warm, but not hot? Is the tape smooth, not pulling at the skin? Is the ear tip free and not discolored (blue, purple, or pale)? Can your puppy move their head comfortably?
Observe your Great Dane for the first hour or so. If they seem excessively uncomfortable, are constantly scratching at their ears, or if the ear tips appear cold or discolored, the posts might be too tight or improperly applied. Remove them immediately and re-post. When done correctly, your Great Dane puppy should be able to go about their normal activities with minimal fuss.
Common Challenges and How to Overcome Them
Posting Great Dane ears isn't always smooth sailing. There will be moments of frustration, moments of doubt, and maybe even a few moments where you question your life choices. But stick with it! Understanding common problems and how to tackle them will help you navigate this journey.
Ears Falling Down Too Quickly
This is perhaps the most common frustration. You've just posted them, and within a day or two, one or both ears are flopping over. This can be due to a few factors:
- Moisture: Even a tiny bit of moisture on the ear when posting can prevent the adhesive from sticking properly. Ensure the ears are absolutely, completely dry.
- Loose Wrap: The tape might not be wrapped snugly enough around the post and ear. It needs to be firm, but not constricting.
- Insufficient Adhesive: You might not be using enough skin adhesive, or it wasn't tacky enough when you applied the post.
- Active Puppy: Puppies are notorious for rough play, head shaking, and general mischief, all of which can dislodge posts.
- Wrong Post Size: The post might be too thin, too short, or too flexible to provide adequate support.
Solution: Remove the old posts, thoroughly clean and dry the ears again. Ensure your posts are firm and the correct length. Apply skin adhesive carefully, let it get tacky, and wrap the tape firmly and smoothly, ensuring no wrinkles. Consider a more robust bridge if both ears are falling. And don't despair; consistency is key. Just re-post!
Skin Irritation and Sores
Redness, itching, and even open sores are alarming but can happen, especially with sensitive skin.
- Tape Too Tight: The most common cause. Constricting blood flow or putting too much pressure on one spot can cause irritation.
- Lack of Cleaning: Trapped dirt, ear wax, or moisture can fester and lead to irritation or infection.
- Allergy to Materials: Some dogs might react to certain tapes or adhesives.
- Leaving Posts On Too Long: Posts should generally be changed every 3-5 days, or sooner if they get wet, dirty, or start to smell. Leaving them on longer increases the risk of skin issues.
Solution: Immediately remove the posts. Gently clean the irritated area with a mild antiseptic wash and allow it to air dry completely. You can apply a very thin layer of a soothing, non-toxic ointment (check with your vet first) or a drying powder to help it heal. Do NOT re-post until the skin is fully healed. When you do re-post, ensure your technique is gentle, the tape isn't too tight, and you're using porous, breathable tape. If the irritation is severe or doesn't improve, consult your vet immediately. Even with the best care, sometimes an ear can get irritated or even infected. This is where having robust pet insurance like Healthy Paws can truly be a lifesaver, helping to cover unexpected vet bills for complications.
Dealing with a Resistant Puppy
Some Great Dane puppies are little angels during posting; others act like you're trying to remove a limb! If your puppy is fighting you every step of the way:
- Make it Positive: Associate posting with high-value treats and praise. Make it a calm, routine event.
- Short, Frequent Sessions: Don't try to rush. If your puppy is getting agitated, take a break.
- Enlist Help: An extra set of hands can be invaluable for holding and distracting your puppy.
- Start Young: The younger they are, the more amenable they typically are to handling.
- Consult a Professional: If you're truly struggling, a professional dog trainer or your vet tech can offer hands-on guidance or even post the ears for you for a fee. This is part of the ongoing Paying to Train a Great Dane Early commitment.
Remember, consistency, cleanliness, and patience are your best friends throughout this process.
| Problem | Potential Cause | Solution |
|---|---|---|
| Ear drops quickly | Loose tape, moisture, weak adhesive, post too short | Re-post carefully, ensure ears are bone dry, use skin adhesive, use longer post |
| Redness/irritation | Tape too tight, unclean ear, allergy | Remove post, clean, allow to heal, apply powder, use porous tape |
| Foul odor | Moisture, trapped debris, infection | Remove post immediately, clean thoroughly, inspect for infection, vet consult |
| Puppy constantly scratches | Discomfort, itchiness, wrong tape | Check for tightness/irritation, ensure ears are clean, distract with toys/chews |
| Swelling around ear base | Tape too tight, allergic reaction, infection | Remove post immediately, inspect, consult vet, do not re-post until swelling gone |
When Can You Finally Stop Posting? The "Done" Signal
The question on every cropped Great Dane owner's mind is, "When will this end?!" There's no set timeline, but generally, Great Dane ears are posted until the puppy is between 6 and 18 months old, with some taking even longer. It really depends on the individual dog's ear cartilage and growth rate. The goal is for the ears to stand firmly on their own, even when the dog is excited or tired.
Testing the Ears: The "Leave Down" Method
You'll know it's time to start testing when the ears feel firm and solid to the touch, and they stand perfectly erect and parallel after a period of being posted. To test them, simply remove the posts and leave the ears down for a short period – a few hours initially.
Observe them closely. Do they stand up naturally? Do they droop after a bit? If they start to droop, even slightly, it's time to re-post immediately. Gradually increase the "down time" over days and weeks. Go from a few hours, to half a day, to a full day. If the ears continue to stand perfectly, even through play and sleep, you're getting very close. Knowing When a Great Dane Is Done with posting is a truly rewarding moment.
The "Helicopter Ear" Phase
Sometimes, during the testing phase, one or both ears might stand but flop over at the tip, looking like a little helicopter propeller. This is often a sign that the base of the ear is strong, but the tip still needs a little more support and hardening. When this happens, you might consider "tipping" – posting just the upper portion of the ear or using very light posts for a shorter duration. Don't give up if you see this; it means you're almost there!
The Grand Unveiling: Tapering Off
Once your Great Dane's ears can comfortably stand for a few days without posting, even after rigorous play or a good nap, you can consider yourself officially done! You might choose to do one final "maintenance" post for a week or so, just to be absolutely sure, but then you can retire your posting supplies.
It's a huge milestone and a testament to your dedication! Take a moment to celebrate your hard work and enjoy those beautifully set ears. Remember, the journey of Caring for a Great Dane Past Six or beyond means continually monitoring their health, including their ears, but the intense period of posting will be behind you.
Disclaimer
This article is for general informational purposes only and does not constitute professional advice. Laws, prices and regulations vary by location and change over time. Consult a qualified professional for guidance on your specific situation.